If you’ve been following along on the Sandringham renovation, you know that one of our biggest projects was the bathroom renovation.
In this post, I’ll be sharing all the before & after details for this bathroom renovation in Sydney.
But before that, if you want to check out the other posts to catch up, here’s the before, mid-renovation update, and completed project.
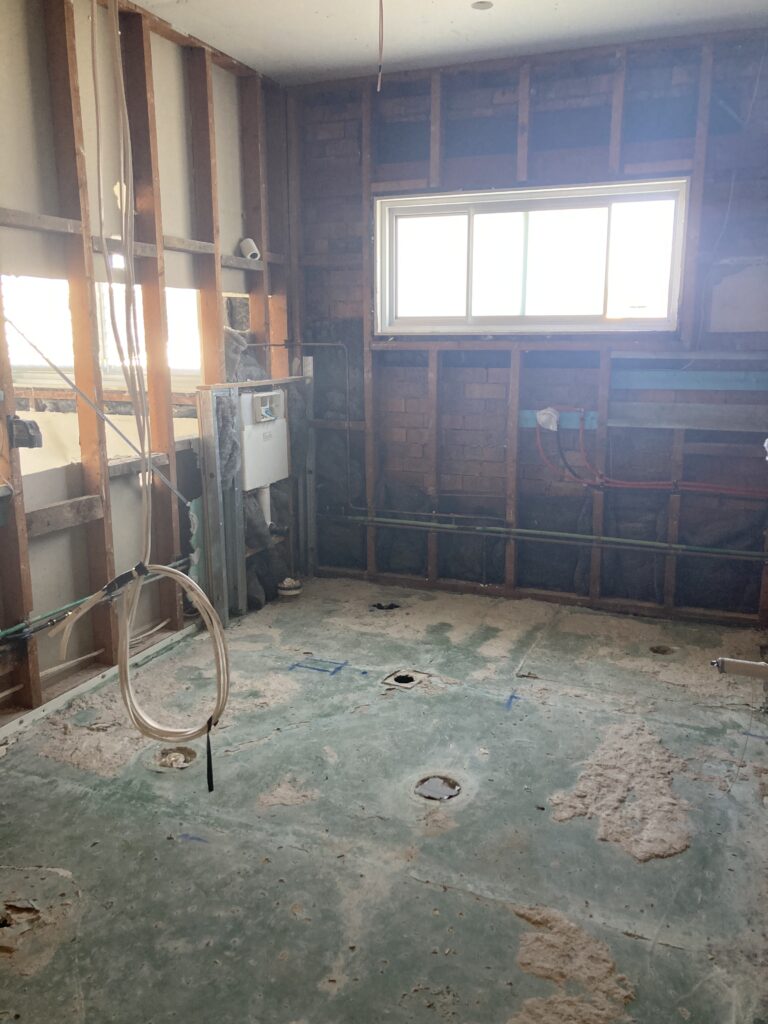
Before the bathroom renovation
As I’ve mentioned previously, this home was in two units when I first took on the project.
This XL bathroom was actually located in the studio unit so it’s proportions weren’t quite right for how many people were using the bathroom. (In addition to a large kitchen & laundry room)
In fact, this was actually the LARGEST bathroom in the house even though the other unit had 4 bedrooms. That might also explain why there was a bathroom in the downstairs cupboard – none of the other bathrooms could fit one!
When it became clear that the house needed to be restored to a one family home, it made sense to renovate this bathroom for better functionality and a bit of a showpiece.
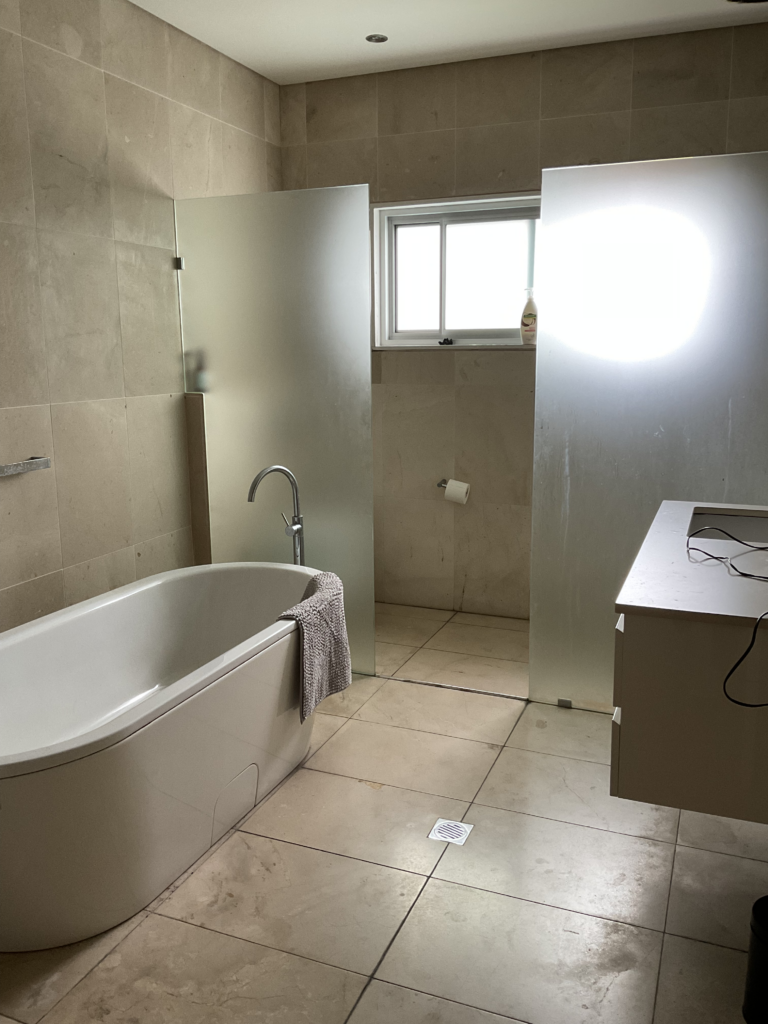
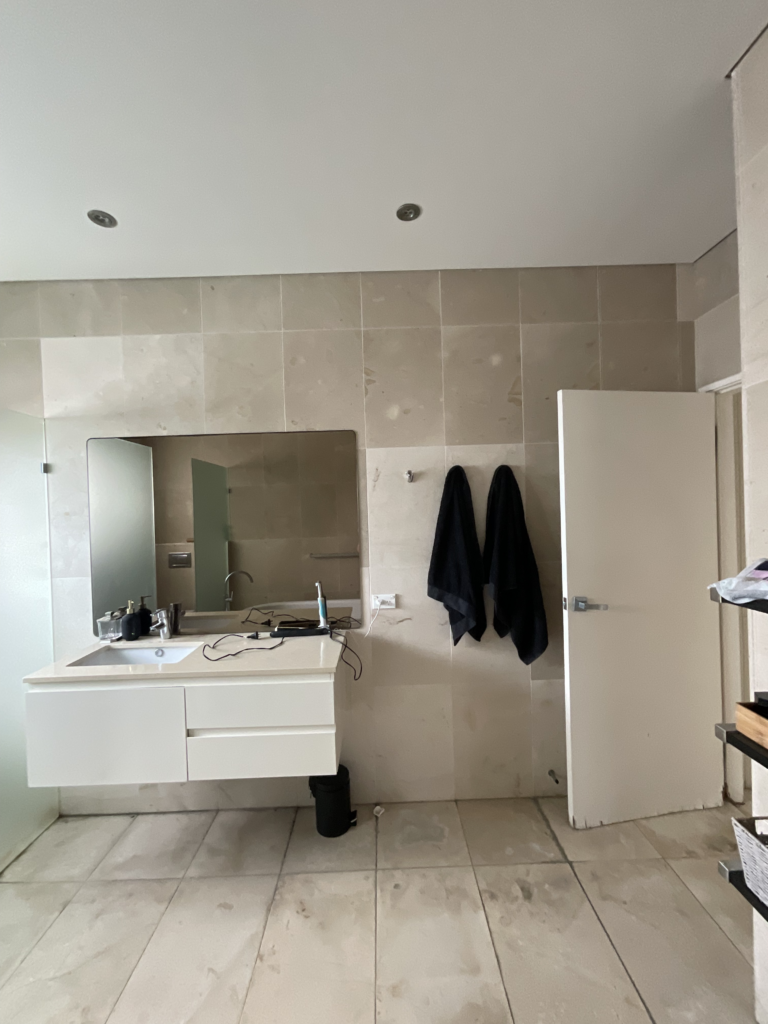
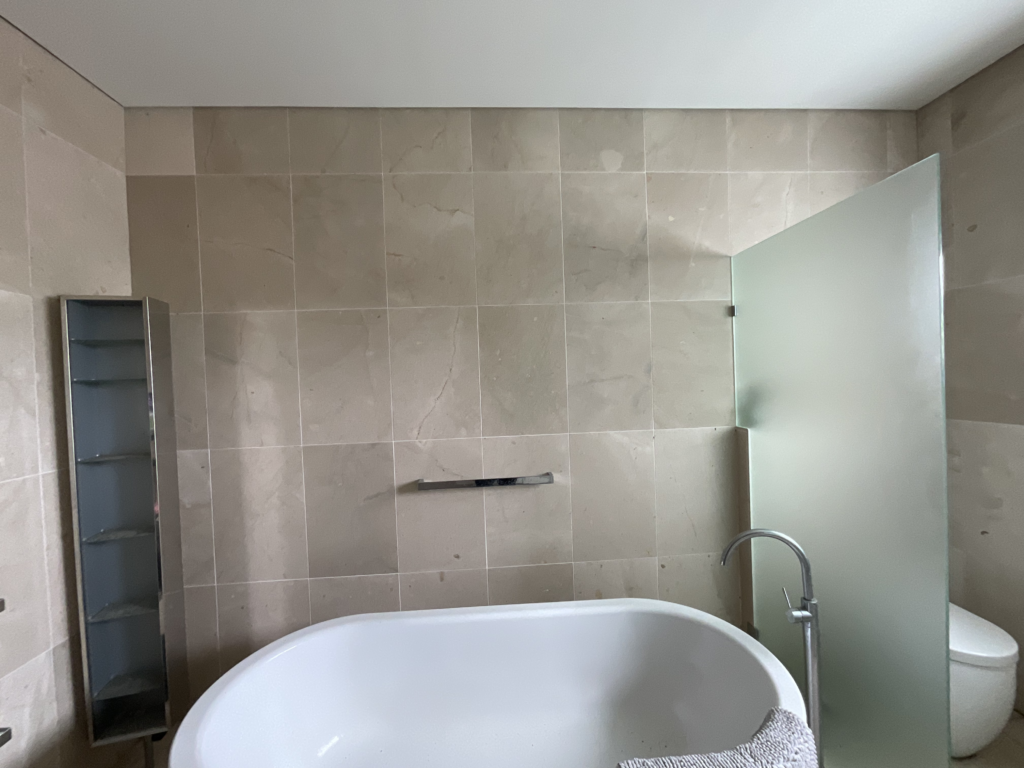
For starters, everything was scrunched up in the back – leaving a lot of unused space.
Bathroom Design
In the design, we gave everything more space to breathe. We moved the bathtub closer to the near wall and enlarged the spaces for the toilet and shower. We also moved the vanity closer to the door.
Instead of a shower screen hiding the toilet, we opted for a nib wall. It doesn’t hide the toilet completely but at least now you won’t see it while relaxing in the bathtub and provides a little bit of privacy (and hiding toilet rolls).
As for tile choice, we really struggled.
Renovating a portion of a home can often times be harder than doing a full renovation.
And in this home, it was especially difficult because the designs were very consistent. For example, the same tile ran throughout the entire home – floors, bathrooms, etc.
So this bathroom needed to stay consistent in that it wouldn’t look odd in the same home with 3 other bathrooms with different tile but also look new and modern.
Tile Choice
Another thing we struggled with was the colour.
Because of the soft frosted window, tiles that looked beige and warm in tile shops would show up grey and cool in the space.
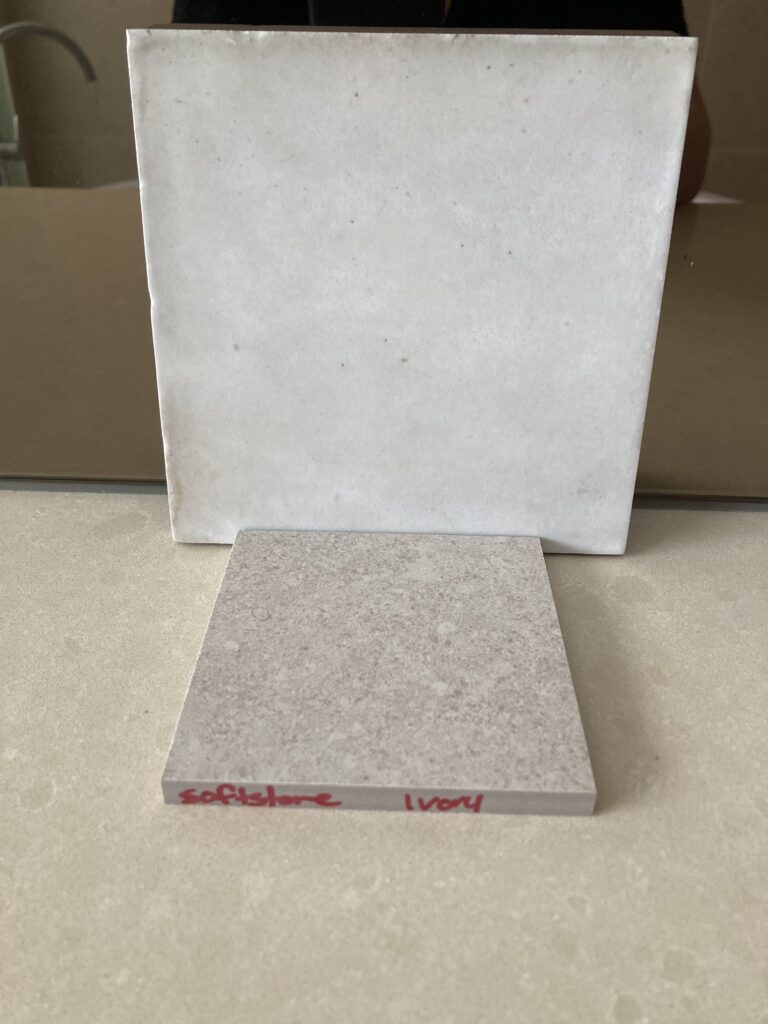
These tile samples looked warm & beige in the tile shop but became cool due to the bathroom’s window.
I actually went through quite a few tile samples before we settled on the final choice!
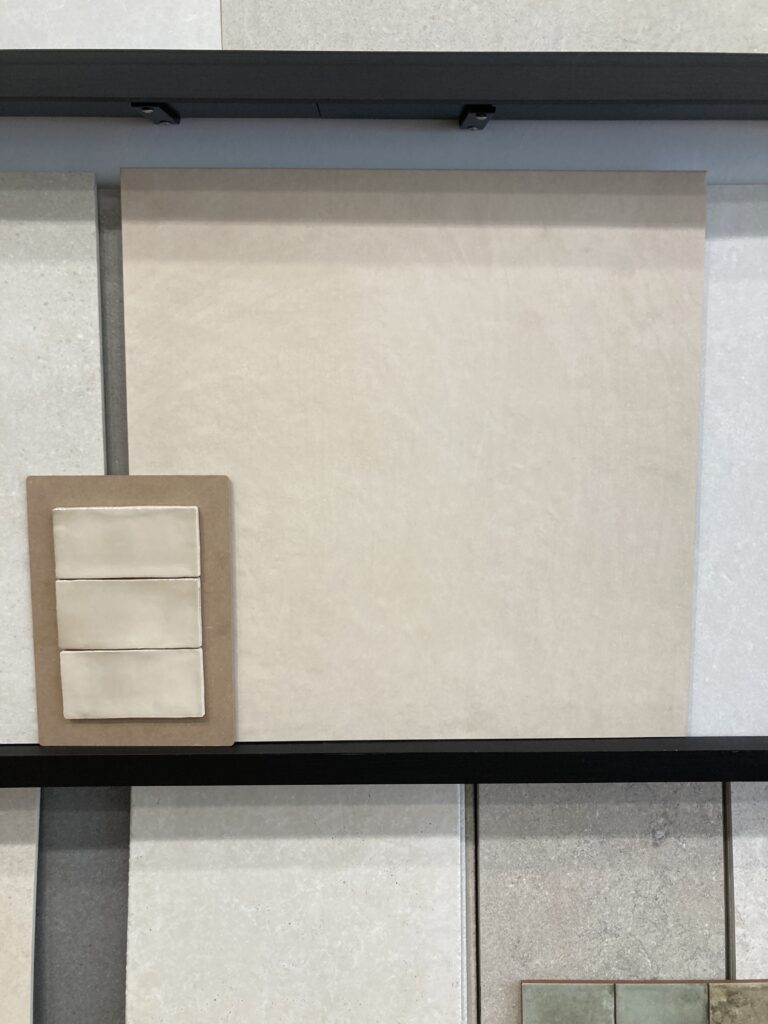
We ended up choosing two tiles that were more beige / brown in the shop but softened when in the space. Even our builder & tiler thought the tiles would be too dark but as I said, the light changed the colour tone of the tiles!
Tapware
Again, with keeping consistent with the rest of the house, we went with chrome tapware. We explored other colour choices (I fell in love with an antique brass colour) but it would stand out too much from the rest of the house.
Thankfully, ABI Interiors has some gorgeous chrome pieces so this limitation worked out fine.
During the Bathroom Renovation
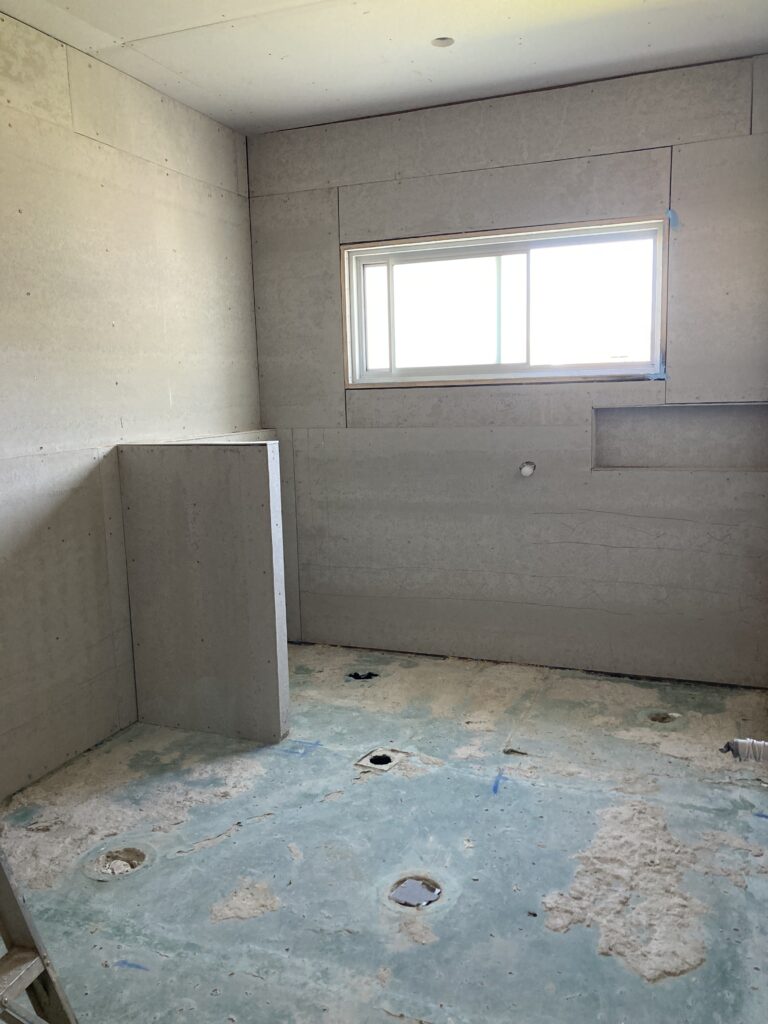
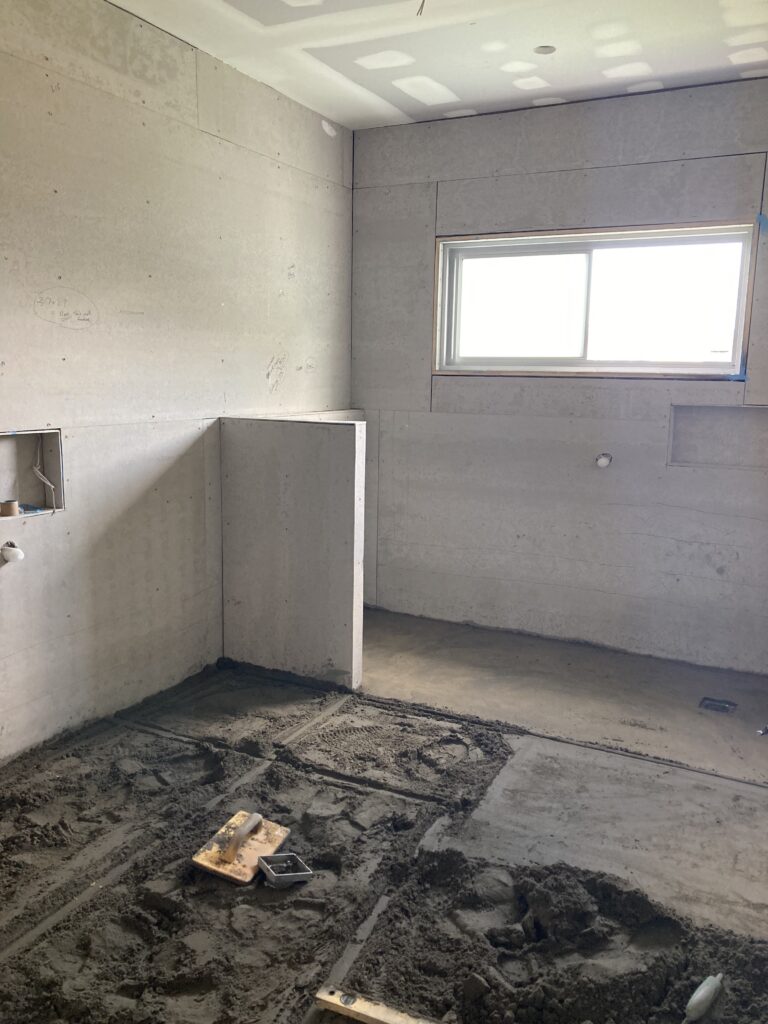
It’s important to know that we did a full renovation – not just cosmetic. Everything was removed, we refitted the plumbing and electrical, and new waterproofing.
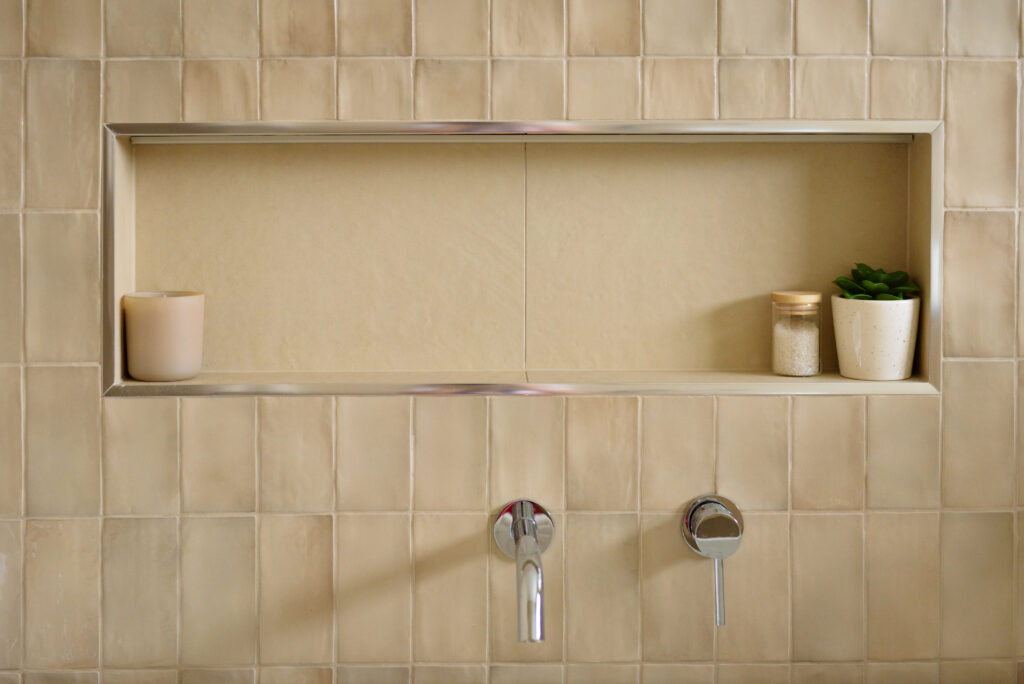
As mentioned, we added a nib wall as well as a niche for the bathtub and in the shower. We also put in feature lighting in the bathtub niche and under the vanity. For vanity lighting, we chose an LED mirror for ambient lighting as well as makeup application.
Now let’s see the results of this bathroom renovation in Sydney…
After the Bathroom Renovation
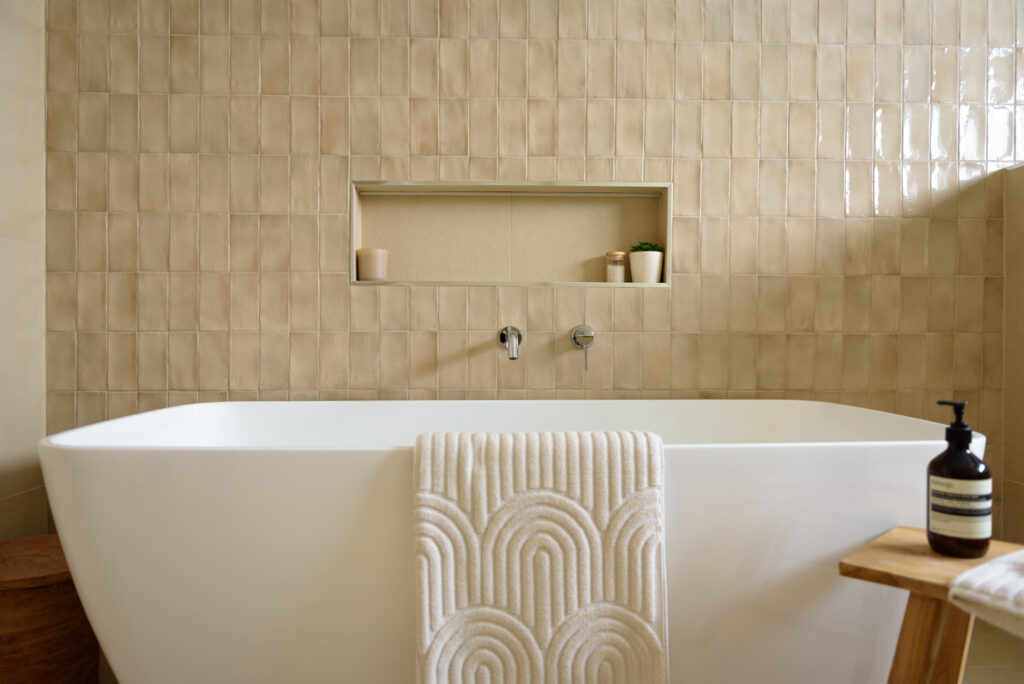
The pictures speak for themselves, but we had quite the transformation turning this mid-2000s bathroom into a modern spa retreat.
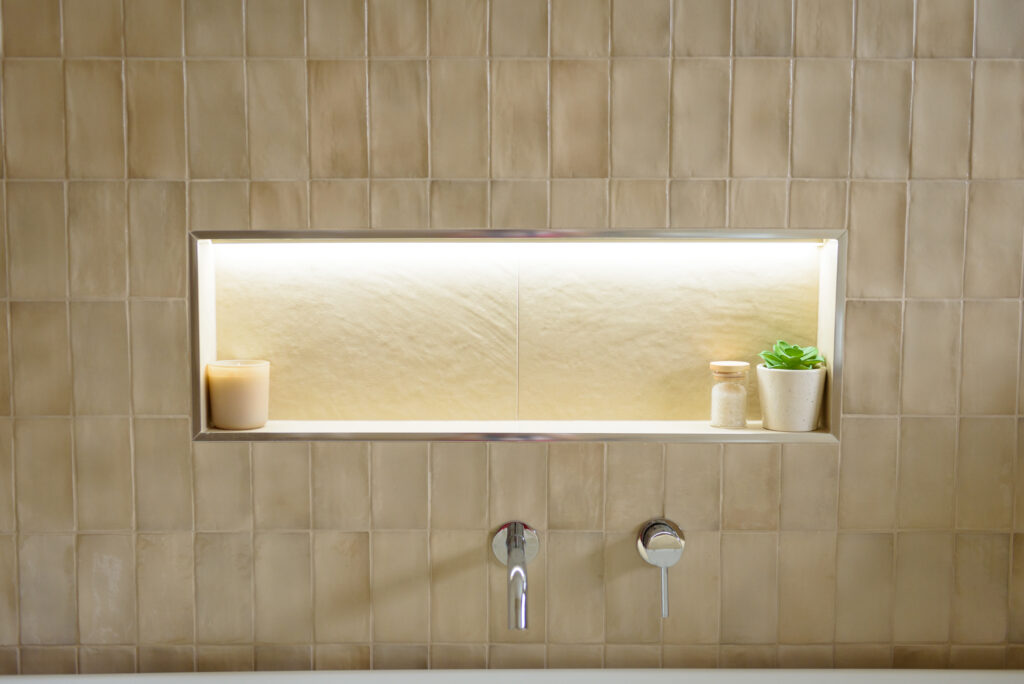
We used the small handmade gloss tiles (Manacor Argile Beige 75×150) on the bathtub wall in a vertical stack pattern. There’s some variation in the tile and it reflects the window light beautifully.
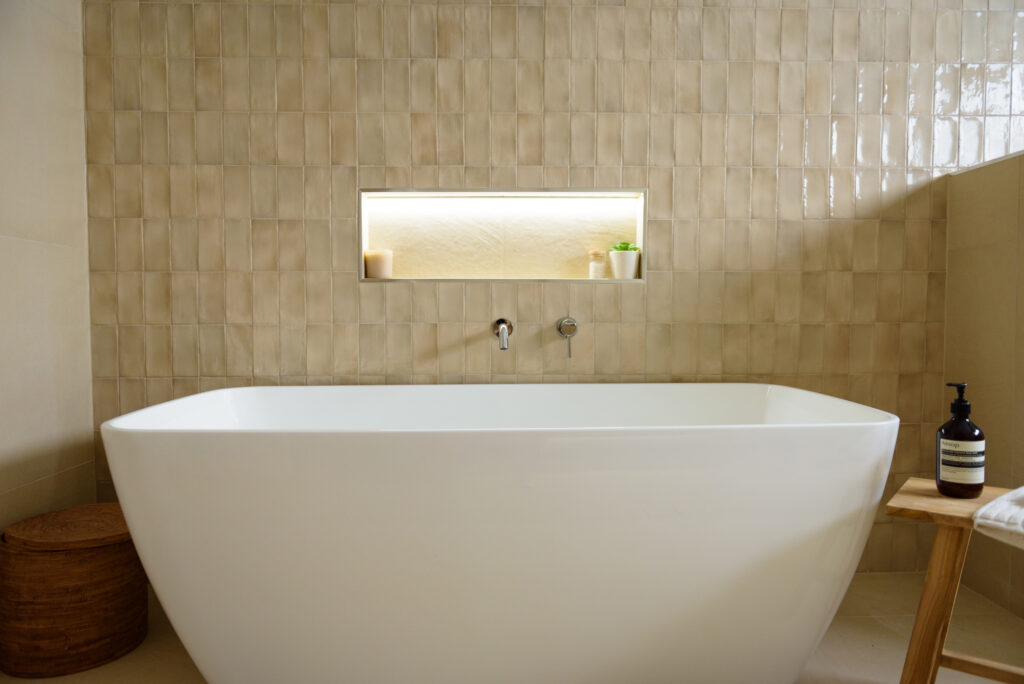
We were actually able to reuse the bathtub that was in the downstairs cupboard which fits quite well. We moved the bathtub closer to the left wall and added a new niche centered on the bathtub.
We went with ABI Interiors Elysian Minimal Mixer and Spout for the tapware.
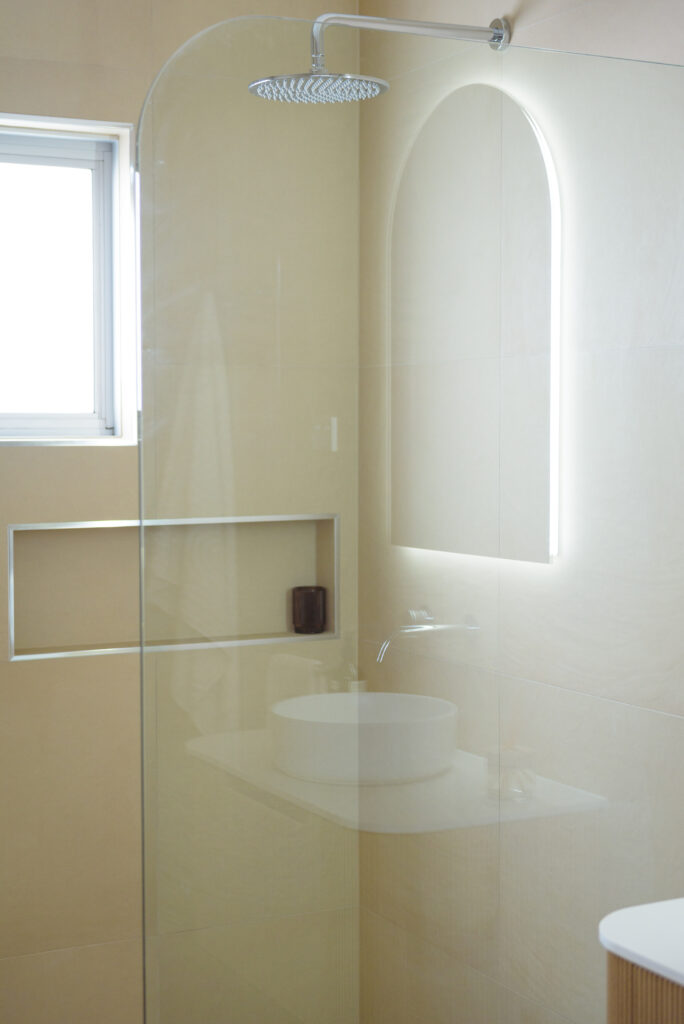
As mentioned, we enlarged the shower and added a new niche. For the shower screen, we used the 950mm radius edge shower screen from Future Glass. I love how it continued the theme of arches and gave added softness to the bathroom.
The shower head is from ABI Interiors.
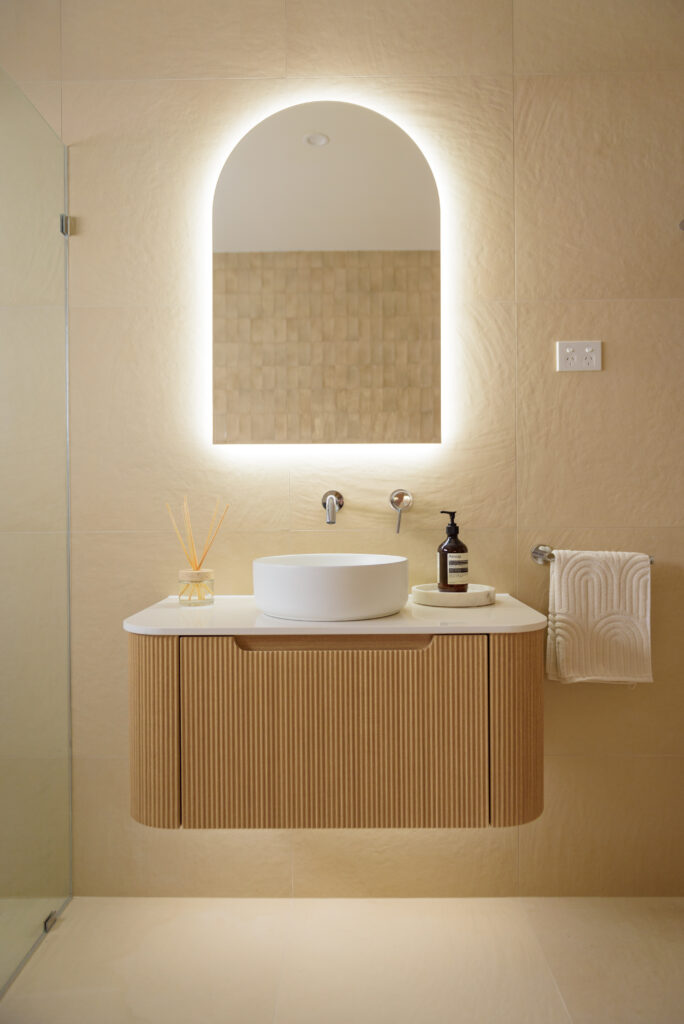
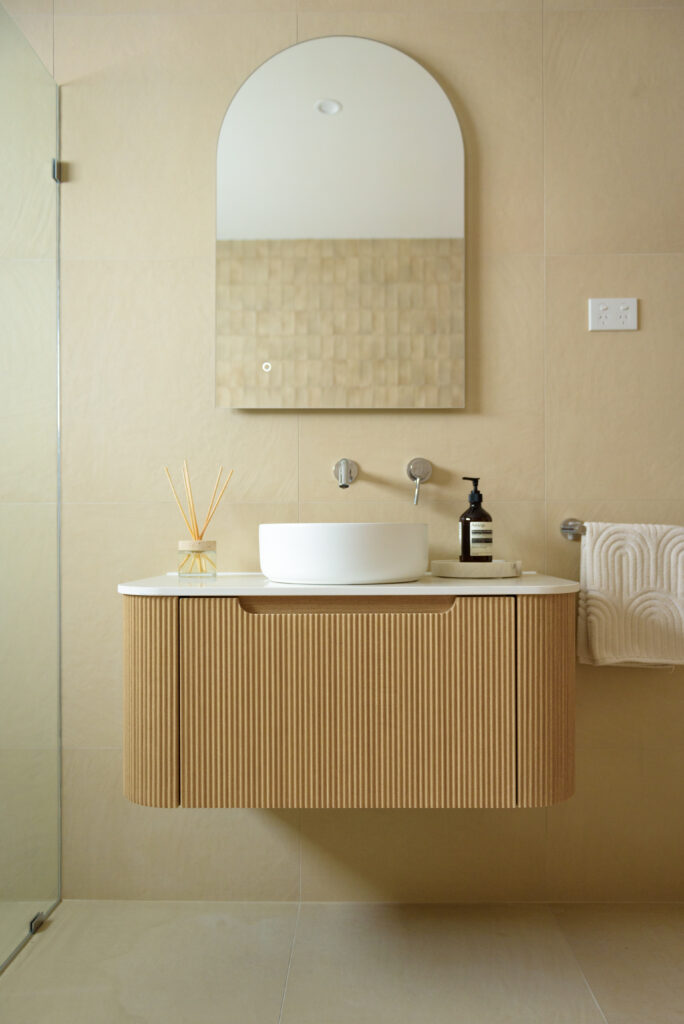
The 900mm fluted vanity is from Mercio (builder sourced) and the white matte above counter basin is also Mercio (purchased from Bathroom Sales Direct).
The LED mirror is from My Homeware and has multiple colour settings. We opted for the cool light to soften the warmth of the tile and match the other LED lighting.
We used the same Elysian Minimal Mixer & Spout from ABI Interiors for the basin and the hand towel rail (as well as all other fixtures and fittings) in also from ABI.
The floor and wall tile is Fornace Avorio 600×600 porcelain tile. It has a beautiful soft texture and is non-slip – perfect for walking barefoot in a wet area!
Lighting
Previously, the only lighting in the bathroom came from the overheads. We replaced the downlights but wanted to add feature lighting as well for function as well as ambience in the evening.
In addition to the LED mirror, we added LED strip lighting under the vanity and in the bathtub.
This addition creates beautiful lighting in the evening for relaxing soaks in the bathtub or even as a night light.
Conclusion
What do you think of this bathroom renovation in Sydney?
Update: the home sold in June 2024 for $3.42 million.
And if you’re a homeowner in Sydney thinking about selling and wondering if renovations like this would increase the value of your home, I offer consultations.